Your graduate wants photos — the cap toss, the family hug, the cake, the speeches. A DIY photo booth for a graduation party feels like the obvious answer: build a corner, add props, let people pose.
We get it. We've seen gorgeous backyard setups with balloon arches and school-color streamers, and DIY absolutely can work. But before you spend a Saturday at the craft store, it's worth knowing exactly what a DIY booth captures — and what it quietly misses. This guide walks through a real DIY build (backdrop, props, lighting, budget, and setup) and then covers the option most families wish they'd known about earlier: skipping the booth and giving every guest a camera with one QR code.
What a DIY photo booth includes
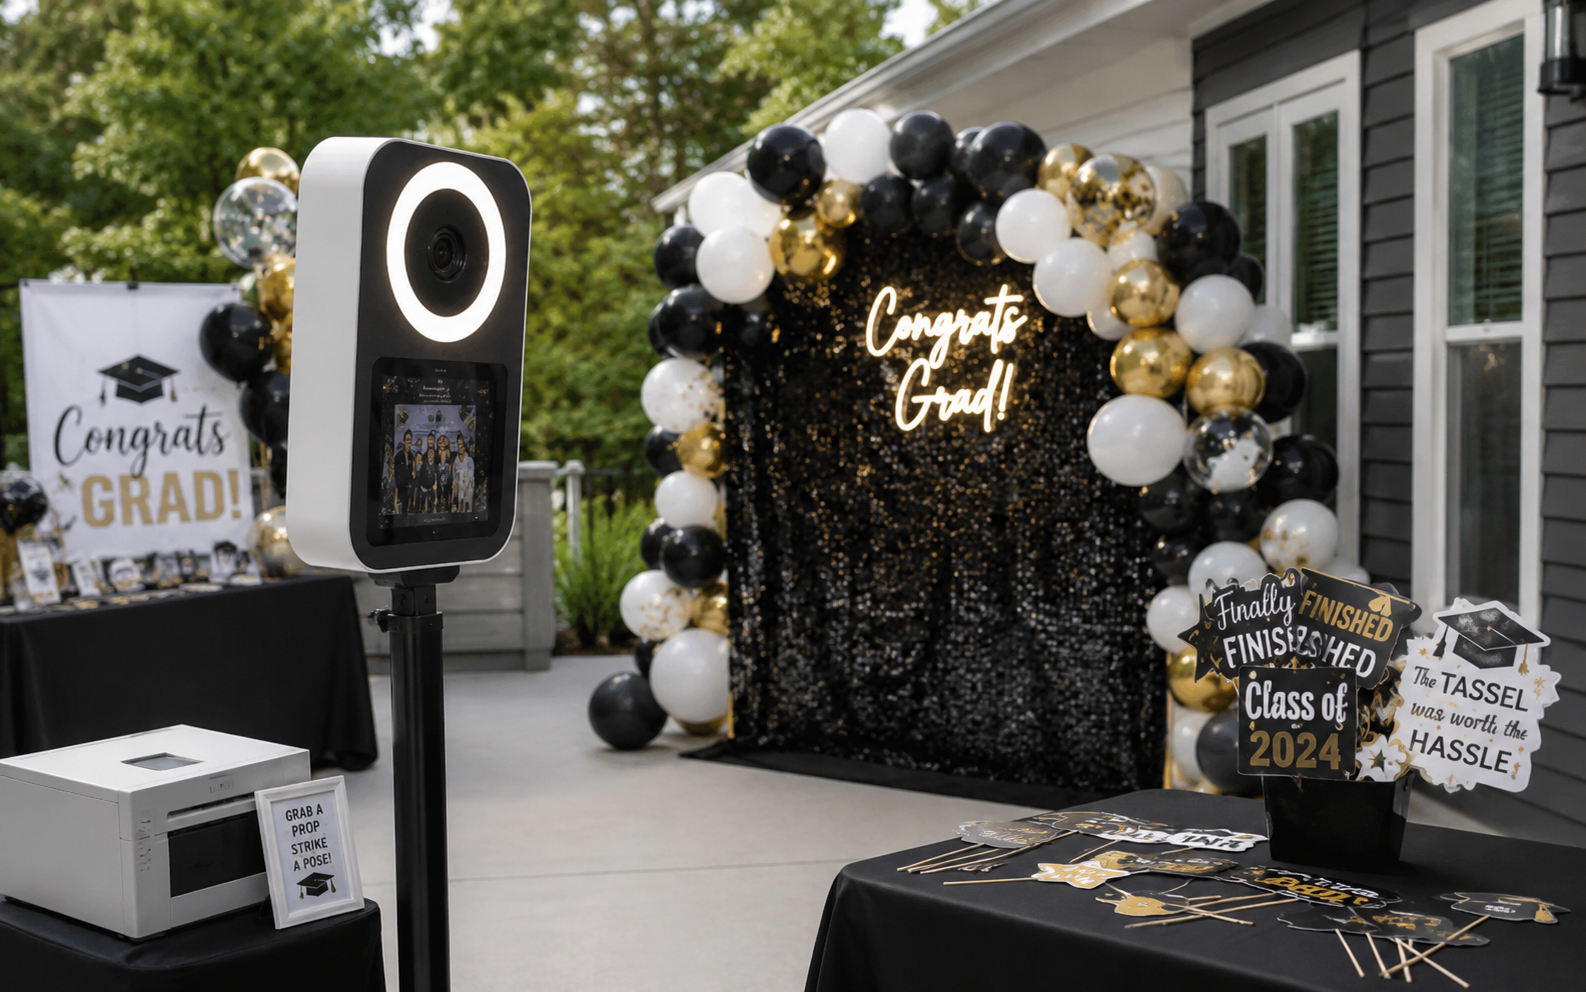
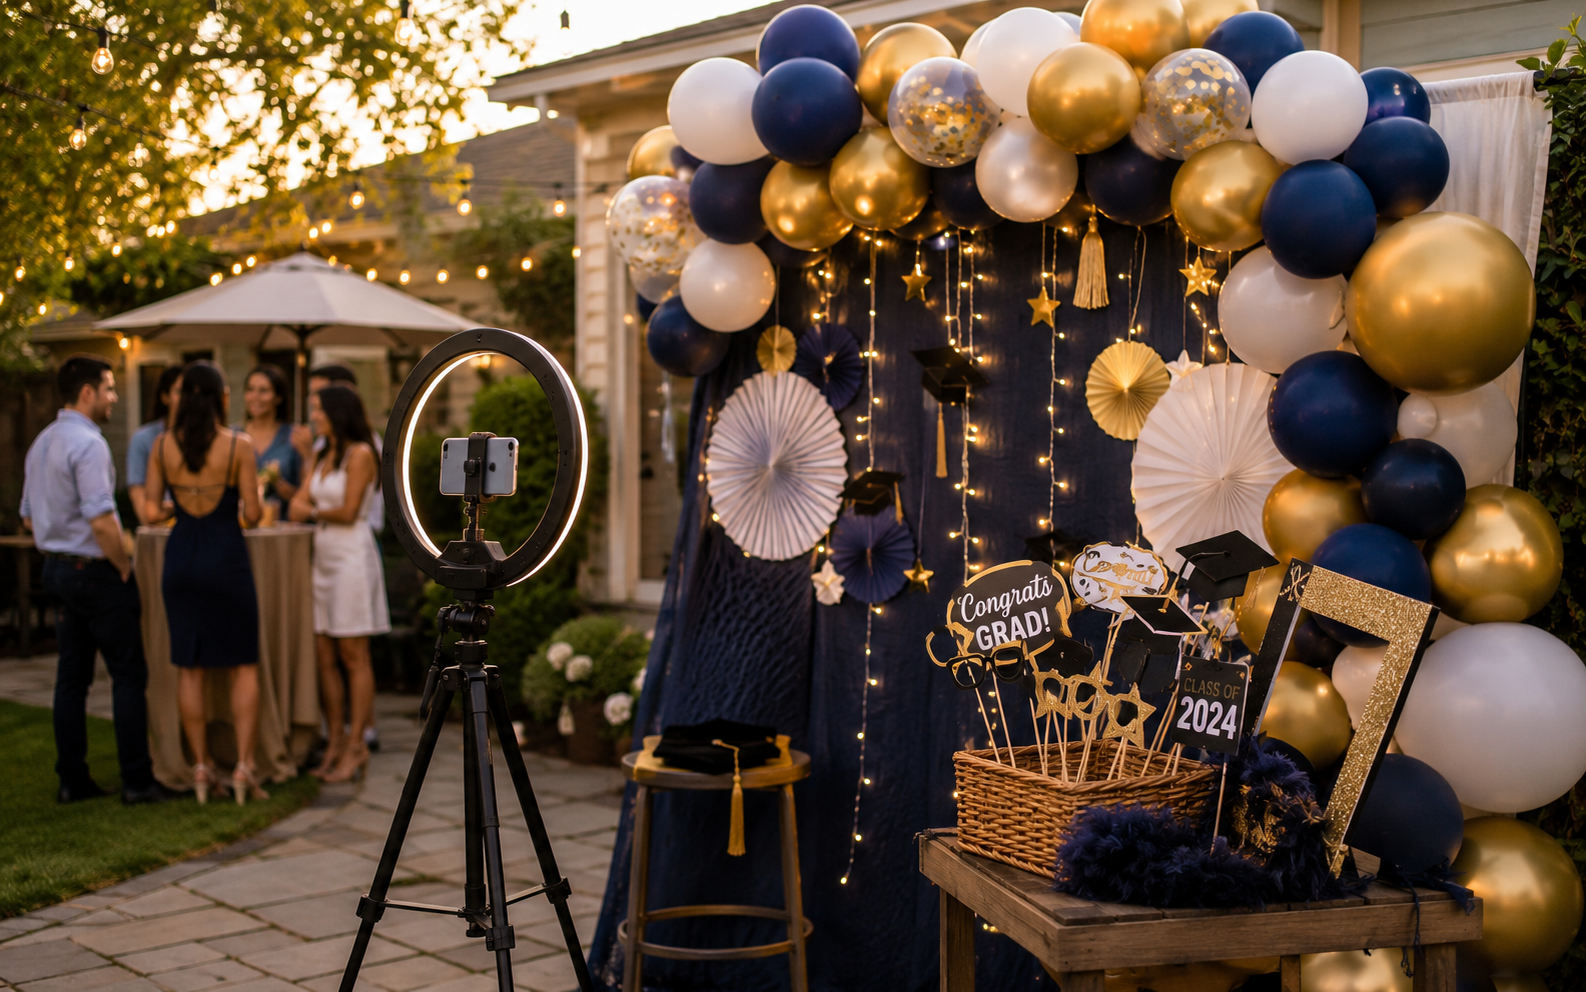
A classic DIY graduation photo booth has four pieces. Get these right and it looks great; skip one and it falls flat.
- Backdrop. A fabric panel, sequin curtain, balloon garland, greenery wall, or printed banner with the grad's name and year.
- Props. Oversized glasses, "Class of 2026" signs, diploma scrolls, silly hats — with a real cap and gown as the anchor.
- Lighting. A ring light or two soft lamps at 45-degree angles, so phone photos aren't grainy after sunset.
- Capture device. A phone or tablet on a tripod with a self-timer or booth app, a camera, or a Polaroid for instant prints.
The real budget
| Item | Typical cost |
|---|---|
| Backdrop + stand | $30–$80 |
| Props (DIY or Amazon) | $15–$40 |
| Lighting (ring light) | $20–$50 |
| Tripod + phone holder | $15–$25 |
| Total | $50–$150 |
That's a lot cheaper than photo booth rental for graduation party ($300–$600), and you keep the props for the next sibling. The trade-off: one corner, mostly staged shots, and you (or a volunteer) playing attendant all day.
Choosing a backdrop
The backdrop is the heart of the booth, and you have far more options than a sheet taped to a wall:
- Balloon garland — the most photogenic and on-trend; a $15–$30 kit plus 45 minutes, and it doubles as party decor. Build it in the grad's school colors with a mix of balloon sizes for an organic look.
- Fabric or sequin curtain — clean, reusable, packs flat; needs an adjustable backdrop stand ($25–$40).
- Foil fringe curtain — a few dollars, adds shimmer and movement under good light.
- Greenery or flower wall — looks expensive but assembles from faux garlands zip-tied to a lattice or mesh panel.
- Printed banner — a custom "Class of 2026 — [Name]" vinyl (~$30–$50) is the most personal and turns every photo into a keepsake.
- Budget focal point — a grid of the grad's photos through the years, or a hand-lettered chalkboard, for almost nothing.
Whatever you choose, size it generously — at least 6.5 ft wide by 7 ft tall — so a group of four or five fits without cropping heads, and leave floor space so people can back up. Tie it to your graduation party decorations with the grad's colors.
Props that actually get used
The difference between a prop basket that empties and one that stays full is choosing things guests genuinely want to hold. The anchor is a real cap and gown or a spare tassel — everyone wants a shot in the regalia. Beyond that, oversized glasses, foam fingers, and silly hats pull in the hams, but the real workhorses are sign props on sticks: print speech bubbles like "We're so proud," "Finally!," and "Next stop: college," glue them to paint stirrers or dowels, and guests instantly know what to do.
The props that resonate most are tailored to your grad's next chapter — a toy stethoscope for a future nurse, a mini ball or jersey for an athlete, a passport or globe for someone heading abroad. You can make a full set for under $15 with printed templates, or buy a $15 Amazon pack. Keep them in a basket at grabbing height right by the booth (props people can't see are props people won't use), add a small "strike a pose!" card to break the ice for shy guests, and straighten the pile a couple of times during the party so it stays inviting.
Lighting and capture
Lighting is what separates a crisp booth photo from a grainy one, and it's the step people skip and regret. Faces need soft, even front light — a ring light on a stand behind the camera is the simplest fix, and two softbox lamps at 45-degree angles is even better. Avoid the two classic mistakes: a single harsh overhead light that casts shadows under the eyes, and a bright window or light directly behind guests that turns faces into silhouette. Outdoors, shoot in open, even shade, never harsh midday sun. Crucially, test your lighting in the actual booth spot at the actual party time — a backyard at 4pm and a living room at 9pm behave completely differently.
For capture, mount your phone, tablet, or camera on a stable tripod at chest-to-eye height and use a self-timer or a booth app with a countdown, so guests take their own photos without one person stuck as operator all day. A booth app can add a countdown, a template, and a photo-strip layout. Instant/Polaroid prints are fun but film runs $1+ per shot and adds up fast. Whichever you pick, add a QR code beside the booth — it solves the one problem no booth can solve on its own: getting all those photos, plus the candids from the rest of the party, off everyone's phones and into one place.
Build a PVC backdrop frame
If you want a freestanding backdrop you can reuse, a PVC pipe frame is cheap and takes about 30 minutes:
- Buy the pipe. Four 5-foot and two 4-foot lengths of ¾-inch PVC, plus four elbow joints and two three-way connectors (~$25).
- Build the uprights. Connect a 5-foot pipe to each base with T-connectors and short foot pieces so it stands on its own.
- Add the crossbar. Join the uprights across the top — aim for about 7 feet tall and 6.5 feet wide.
- Weight the base. Slip on sandbags or fill the foot pipes with sand so it won't tip in a breeze.
- Hang your drape. Clip fabric, a sequin curtain, or a balloon garland to the crossbar with curtain rings.
It breaks down flat for storage and works for every future party.
Step-by-step setup and placement
Two weeks before. Order the backdrop and props; test your lighting in the real spot at the real time.
Day before. Assemble the backdrop, charge the capture device, and print a small sign: "Take a photo — then scan to share more."
Day of. Place the booth where people already gather — near the food or drinks, not in a side room. Leave room for a small line without blocking the buffet, point good light at it, and assign someone outgoing to pull the first few guests in during the first hour. Once photos start, others follow.
Poses and prompts that beat the awkward stand-there
The most common booth photo is also the worst: a row of people standing straight, arms at their sides, wearing polite half-smiles. A booth's whole job is to loosen guests up, so give them something to do rather than just a place to stand. A small "try these poses" card taped at eye level does more than any prop — list five quick ideas like "jump on three," "everyone point at the grad," "worst graduation face," "toss the cap," and "group huddle looking up at the camera." Rotating prompts get guests to take several shots instead of one stiff frame, which means more keepers and more laughter. Encourage motion, because action photos almost always beat static ones — a mid-jump shot or a caught-laughing frame has an energy a lineup never will. And nudge guests to take one "serious" and one "silly" version every time; the silly one is nearly always the picture the family ends up framing. None of this costs a cent, and it's the single biggest upgrade to the quality of what your booth actually produces.
Weatherproofing an outdoor booth
If your booth lives outdoors, plan for the two things that wreck outdoor setups: wind and sun. A lightweight backdrop stand turns into a sail in the first gust, so weight the base with sandbags or fill the feet with water, and anchor a fabric drape at the bottom as well as the top so it doesn't billow into every shot. Point the booth so the sun is behind the camera or, better, set it in open shade under a tree or canopy — direct afternoon sun causes squints, harsh shadows, and blown-out foreheads that no editing fully fixes. Balloons are especially vulnerable outside, since heat expands and pops latex, so build a balloon backdrop close to party time or choose foil instead. Decide a rain trigger the day before and identify an indoor wall as backup, because relocating a booth mid-party is far easier when you've already picked the fallback spot. Ten minutes of weatherproofing is the difference between a backdrop that photographs beautifully all afternoon and one you're chasing across the yard at 3pm.
Make it easy for kids and grandparents
A booth that only works for able-bodied adults leaves out two groups who produce some of the best photos: little kids and older relatives. For the kids, keep a few smaller props within their reach and let an outgoing older child act as the unofficial booth "director" — they'll happily wrangle their cousins into frame and rack up dozens of candids the grown-ups would never get. Just set the capture device's timer a touch longer so wiggly subjects have time to settle. For grandparents and anyone who can't stand for long, place a stool or chair in the frame so a seated pose looks intentional rather than like an afterthought, and keep the booth on a flat, easy path rather than across a gravel yard or up a step. Bring the props to them if getting up is hard — a cap and a sign handed to grandpa in his chair makes a portrait the whole family treasures. A booth that welcomes every age captures the full span of who showed up, from the youngest cousin to the great-grandparent, all in one set of photos.
DIY vs rental vs QR gallery
| DIY booth | Rental booth | QR guest gallery | |
|---|---|---|---|
| Cost | $50–$150 | $300–$600 | $49 once |
| Coverage | One corner | One corner, time-limited | Entire venue |
| Candid photos | Rare | Rare | From every guest |
| Setup time | Half a day | Vendor handles it | 2 minutes |
| Open-house friendly | Poor | Poor | Excellent |
| You keep the originals | Yes | Sometimes | Yes, full quality |
Rough cost scenarios: a bare-bones DIY (fabric backdrop + phone + printed props) runs ~$40 for one corner; a full DIY build (PVC frame, balloon garland, ring light, props) runs $120–$150, still one corner; a QR gallery is $49 for the whole venue; and the hybrid — a simple $40 backdrop plus the $49 gallery — is about $89 for the best of both.
What a photo booth is really for
Before you commit a Saturday, be honest about what you actually want, because "photo booth" bundles two very different goals people rarely separate. The first is the experience — the props, the poses, the silly moment of a group crowding into a frame. A DIY booth delivers that well. The second is collecting the memories — ending the day with a full album of everything that happened. These feel like the same thing when you're planning, but they're not, and conflating them is why families spend real money on a booth and still end up with few photos.
A booth, DIY or rented, is excellent at the first goal and poor at the second. It captures the people who walk over and pose, in one spot, doing staged shots — and almost nothing of the toast, the grill, the cap toss, or the grandparents at the memory table. If you want the experience, build the booth and enjoy it. If you want the memories, a QR gallery that turns every guest into a roaming photographer serves you far better for less. Most families, once they see it this way, realize they wanted the memories all along.
When DIY still makes sense — and the hybrid
DIY is worth it if your grad specifically wants a props-and-backdrop experience, if you already own the materials, or if you pair it with a QR code. It's not worth it if you're building mainly to "collect photos" (a gallery does that better), if you're hosting an open house with guests arriving over hours, or if you don't want to babysit equipment during your kid's party.
The good news is you don't have to choose. Set up a modest DIY backdrop and a basket of props, then place QR codes on that table and every other table in the house and yard. Guests who love a booth get their moment; guests who'd never walk to one still contribute dozens of candids from wherever they are. It costs maybe ninety dollars total instead of six hundred for a rental, and at the end of the night every photo — staged and candid, from the booth corner and the far end of the yard — sits in one place, ready to download and print.
Troubleshooting
- Grainy or dark photos? Add a ring light and shoot in open shade, not direct sun.
- Nobody's using the booth? Move it near the food and recruit a nudger.
- Blurry group shots? Use a tripod and a 3-second timer instead of passing the phone around.
- Photos scattered across phones afterward? The big one — a QR gallery solves it.
A little photo-booth history
The photo booth isn't a modern invention — the first automated "Photomaton" opened on Broadway in 1925, and New Yorkers lined up for hours to get eight poses for a quarter. A century later the appeal hasn't changed at all: step behind a curtain, ham it up, and walk away with a strip. What has changed is that nearly every guest now carries a far better camera in their pocket than that 1925 machine ever had, which is the quiet irony of renting or building a booth today. The magic was never the box — it was the permission to be silly and the little printed keepsake at the end. A backdrop and a basket of props recreate that permission for almost nothing, and a QR code handles the keepsake for the entire party instead of one corner. Keeping that history in mind helps you spend on the part that actually matters — the experience — rather than the equipment.
The easier path
If the goal is memories, not crafting, you can skip the PVC pipe entirely. Grad Moments is a photo booth for graduation party alternative that needs no corner: one QR code on every table, guests scan and upload from their browser (no app), and every room becomes a photo station. It includes 18 printable QR templates, a photo scavenger hunt, audio and video guest-book messages, and a print-ready album PDF — $49 once, no subscription, no rental.
Your grad won't remember whether the backdrop matched Pinterest. They'll remember who showed up and what was said. Capture all of it — and see the full plan in the graduation party photo ideas guide.
Related: Photo booth rental vs QR · Graduation party photo ideas · Decorations & backdrops · Photo booth product page
Frequently Asked Questions
Collecting guest photos?
Grad Moments gives your guests a QR code to upload photos and videos — no app, no login.
See How It Works