A photo backdrop at a graduation party does two things that matter: it gives guests a clear, obvious spot to take photos (which means they actually do), and it makes those photos look intentional instead of random — no cluttered kitchen counter in the background, no trashcan peeking over someone's shoulder, just the graduate and their people against something that says "this was the party." The good news is that a great backdrop doesn't require an event planner or a big budget. Here's how to build one that guests use all day, looks sharp in every photo, and costs a fraction of what it looks like it cost.
Size and proportions
Get the size wrong and nothing else matters. Too narrow and groups get cropped; too short and the frame cuts at neck level in selfies. Aim for at least five feet wide and six to seven feet tall for standing photos. An eight-foot-wide backdrop comfortably handles groups of four or five, which is the natural size when a family steps up together. If you're hanging it on a wall, a standard twin-size flat sheet or two tablecloths side by side covers the span. If you're building a freestanding frame, PVC pipe from the hardware store in a U-shape (two uprights and a crossbar) costs under twenty dollars and takes ten minutes to assemble.
DIY backdrop ideas
Fabric or streamers wall. The simplest version is a solid-color fabric in one of the grad's school colors — a flat sheet, a shower curtain, or a large piece of craft fabric — pinned, taped, or hung over a wall. Hang foil letter balloons spelling the year or the grad's name across the top, add a tassel garland, and you're done. Total cost: fifteen to twenty-five dollars. It photographs cleanly because the single color provides contrast against people's clothes, and there's nothing competing with the faces.
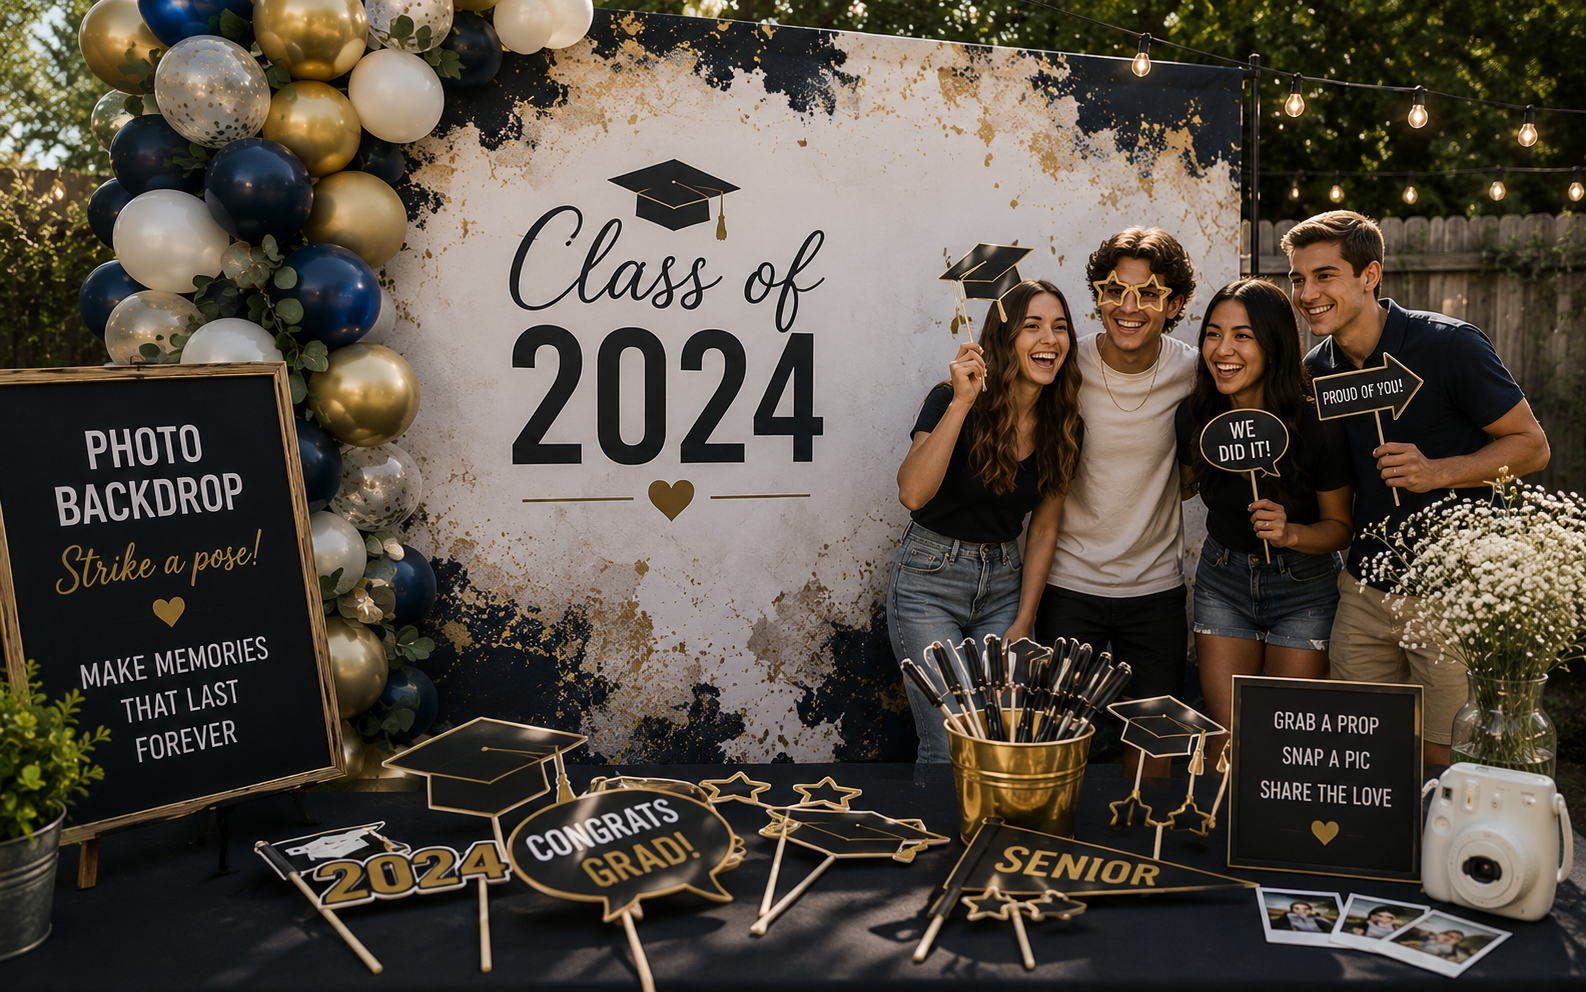
Balloon arch or garland. A balloon garland in school colors curving over the top and down one side of the backdrop is the most-photographed DIY option right now. Buy a balloon-arch kit (they come with a strip you thread the balloons onto), fill sixty to eighty balloons in two or three coordinating colors, and attach the strip to the wall or frame. It takes about forty-five minutes to assemble and runs roughly thirty to forty dollars. The result looks like you hired someone, and it photographs beautifully from every angle.
Photo-collage backdrop. Print twenty to thirty photos of the grad's life from kindergarten to senior year, mount them on card stock, and arrange them on a large board or directly on the wall in a grid or scattered pattern. It serves as both a backdrop and a memory display, and guests spend time actually looking at it rather than just posing in front of it. Cost: the price of prints, roughly ten to twenty dollars if you print at a drugstore or use an online service.
Greenery wall. Artificial greenery panels (the kind sold for fence privacy) zip-tied to a frame create a lush, organic backdrop that works outdoors and indoors. Add a few real or artificial flowers in school colors and a neon-style sign (battery-powered LED wire bent into "Congrats" or the grad's name). The total cost is higher — roughly fifty to seventy-five dollars — but the backdrop is reusable for years and photographs as well as anything a professional event would use.
Lighting makes or breaks it
The most common mistake with backdrops isn't the design — it's the placement in bad light. Harsh overhead light or direct afternoon sun creates deep shadows under eyes and noses that make everyone look tired. The ideal position is facing a window or in open shade outdoors (under a tree canopy or awning where the light is bright but diffused). If you're indoors and the natural light isn't strong enough, two cheap clamp-on work lights bounced off the ceiling or a white wall create soft, even illumination for under fifteen dollars. Avoid using flash from the camera — it flattens the image and washes out the backdrop colors. If the party runs past sunset and the backdrop is outdoors, string lights above and behind the photographer provide warm ambient light that looks great in phone cameras.
Getting guests to actually use it
The most beautiful backdrop in the world is useless if guests walk past it. Position it near the entrance or between the entrance and the food — somewhere guests pass naturally, not in a back room or a far corner of the yard. Add a small sign that says "Photo Spot — strike a pose!" along with a QR code linking to a shared gallery so guests can instantly upload their shots. Place a small prop table next to the backdrop — a few signs ("Class of 2026," "I did it!"), the grad's cap, sunglasses — and guests will pick them up without being asked, which creates funnier, more natural photos than a stiff stand-and-smile pose. A prop table costs almost nothing (you already own most of the items), and it transforms the backdrop from a wall people stand in front of into an activity people participate in.
The QR code next to the backdrop is the single highest-return placement in the whole party. Every guest who poses scans and uploads, and the photos land in a shared album alongside the candids from the rest of the day. Grad Moments makes this automatic — $49 once, the QR code prints with the backdrop, and the gallery builds itself across the whole party.
Outdoor vs indoor placement
The decision between indoor and outdoor changes almost everything about the backdrop. An outdoor backdrop benefits from natural light but fights wind, sun angle, and weather. Stake a freestanding frame firmly into the ground or weigh the base with sandbags — a gust that topples the frame mid-party is the kind of moment nobody forgets for the wrong reasons. Position it so the sun is behind the photographer and the backdrop faces open shade, which gives even, flattering light on faces without squinting. Indoors, you control the light completely but lose the space; a hallway backdrop works for one-at-a-time selfies but jams the moment a group of five wants to squeeze in. If your indoor space is tight, consider mounting the backdrop on a wall near a window and removing any furniture from the photo zone so there's room for groups to step back and actually fit in the frame.
Common mistakes that ruin the photos
Three mistakes show up in almost every DIY backdrop and all of them are fixable in ten minutes. First, a wrinkled fabric background — iron or steam the sheet before you hang it, because wrinkles show up in every phone camera and make the setup look rushed. Second, clutter at the base of the backdrop: cords, boxes, the PVC pipe feet, gift bags someone set down. Clear a two-foot buffer in front and tape down any cables so the photos are clean from edge to edge. Third, positioning the backdrop in the busiest traffic lane so guests have to walk through the photo zone to get to the food. That creates a constant flow of photobombers and makes every group shot feel rushed because someone is waiting behind them. Move the backdrop one step off the main path and the problem disappears.
For the full guide to graduation photos — posing, lighting, display ideas, and how to collect everyone's shots — see the graduation party photo ideas pillar.
Pillar: Graduation Party Photo Ideas
Frequently Asked Questions
Collecting guest photos?
Grad Moments gives your guests a QR code to upload photos and videos — no app, no login.
See How It Works